Painting German Panzer Grenadier (autumn smock)Uniform
 |
Brief HistoryThe term Panzergrenadier was not adopted until 1942. Infantry in panzer divisions from 1939 onwards were known as Schützen Regiments; they wore the same rose pink piping on their uniforms as the tank crews. Soldiers in special Motorized Infantry units wore the standard white piping of the Infantry. In 1942, when Infantry Regiments were renamed as Grenadier Regiments by Hitler as a historical homage to Frederick the Great's Army, the Schützen regiments (and the soldiers in them) began to be redesignated as Panzergrenadier regiments, as did Motorized Infantry units and soldiers. |
Their waffenfarbe was also changed from either white (in the case of Motorized Infantry) or rose pink (with an "S" cypher that distinguished the Schützen from the tank and anti-tank units that also wore that colour) to a grass green shade previously worn by motorcycle troops. Some units did not change over their designations and/or waffenfarbe accoutrements until 1943.
Panzergrenadier Units
Panzergrenadiere operating in the area of Aachen, late 1944.The term Panzergrenadier was applied equally to both the infantry component of Panzer Divisions as well as the new
divisions known as Panzergrenadier Divisions.
Most of the Heer's PzGren. divisions evolved via upgrades from ordinary infantry divisions, first to Motorized Infantry divisions and then to PzGren. divisions, retaining their numerical designation within the series for infantry divisions throughout the process. This included the 3rd, 10th, 14th, 15th, 16th, 18th, 20th, 25th, and 29th divisions.
Others, such as the Großdeutschland Division, were built up over the course of the war by repeatedly augmenting the size of an elite regiment or battalion. The Waffen SS also created several PzGren. divisions by the same methods, or by creating new divisions from scratch later in the war. A number of PzGren. divisions in both the Heer and Waffen SS were upgraded to Panzer divisions as the war progressed.
The Panzergrenadier divisions were organized as combined arms formations, usually with
six battalions of truck-mounted infantry organized into either two or three regiments, a
battalion of tanks, and an ordinary division's complement of artillery, reconnaissance units,
combat engineers, anti-tank and anti-aircraft artillery, and so forth.
All these support elements would also be mechanized in a PzGren. division, though most of the artillery, anti-tank, and anti-aircraft elements were equipped with weapons towed by trucks rather than the relatively rare armored and self-propelled models.
In practice the PzGren. divisions were often equipped with heavy assault guns rather than tanks, due to a chronic shortage of tanks throughout the German armed forces. A few elite units, on the other hand, might have the tanks plus a battalion of heavy assault guns for their anti-tank element, and armored carriers for some of their infantry battalions as well.
On paper a Panzergrenadier division had one tank battalion less than a Panzer division,
but two more infantry battalions, and thus was almost as strong as a Panzer division,
especially on the defensive. Of 226 panzergrenadier battalions in the whole of the German
Army, Luftwaffe and Waffen SS in September 1943, only 26 were equipped with armoured
half tracks, or just over 10 percent. The rest were equipped with trucks.
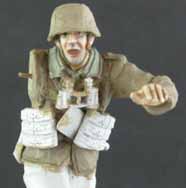
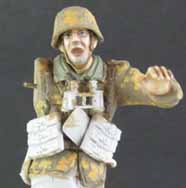
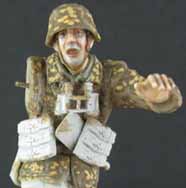
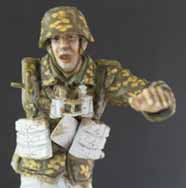
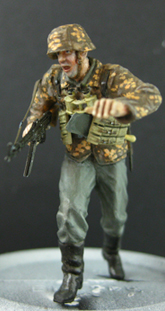
Painting the Miniature FigureThe miniature figure I am painting is from the Tamiya 1/35 German Front Line Infantry I have chosen to paint my miniature figure in autumn camouflage pattern. Therefore the colours that I’m using will be be dominantly warm colours of oranges and browns. On the original autumn uniform pattern, there are 5 different colours. For this session, I am only using 3 colours. The reason for this is the intricacy of the design, size of the leaf pattern and the most obvious: it looks just as good as the original uniform colours. I also realised that with just 3 colours, it looks less cluttered and simpler to shade and highlight.
The first leaf pattern is orange design which is a mix of orange brown, yellow sand and offwhite. The dilution is about the same as the base coat. Try using a fine liner brush to create the leaf pattern cause the pattern is really very tiny and this technique is very handy as the design gets more detailed and intricate.
For example the orange leaf basecolour was first used on the higher parts of a fold while Basic Skintone was added to the basecolour for only the highest areas of the fold. Always remember to thin your paint when highlighting. Painting the trousersPainting a plain coloured uniform is much easier than painting a leaf pattern design. The common method with using acrylics is to paint the basecoat and then adding 3 layers of highlights and 2 layers of shades. The trousers will be painted in German Field Grey as the basecoat. Thin the basecoat with 2 parts water and 1 part paint. Apply 2-3 coats onto the miniature figure. HighlightOnce the basecoat is done, I began working with the first hightlight. For hightlighting I added 25% Basic Skintone with 75% Field Grey. I also thinned down the paint approximately 8-12 part water to 1 part paint. If the paint is too thick, it will clog up the area and achieving the highlighting effect becomes difficult and messy. For this first highlight, you need to visualize with lighting coming from the top of the miniature figure. Normally what I do is to paint the figure with lighting right on top of me. With the light as a guide I apply onto the trouser areas which is prominent and facing the top. Later I will use this same mixture to blend the basecolour and second highlight. For the second highlight I mix 50% Basic Skintone with 50% Field Grey. Similarly I thinned down the mixture and this time round, I apply only the prominent areas or folds facing upwards. The third and final highlight, as you can guess it, I mix 75% Basic Skintone to 25% Field Grey. I only highlight the highest areas of the trousers. Once all done, the blending or transition from one highlight to the other should look gradual. If it is’nt , use the same highlight mixes again to touch up the areas which is not blended well. With a Liner Brush, I then outlined the seams of the trousers using a thinned down Matt Black. Painting AccessoriesThe leather belt and webbing is a mix of Vallejo Glossy Black and Leather Brown. I then use Orange Brown to highlight the prominent areas. Similarly for the boots, I use the same mix and highlight but also added some Iraqi Sand to give it a dusty look. The ammo pouch and breadbag on this miniature figure, is painted using a mix of Khaki and Yellow Sand. To highlight this, I just added some Offwhite.
|


