
Painting German Wehrmacht(Heer)infantry
 |
Brief HistoryWehrmacht (listen) (help·info) (literally "defense force") was the name of the unified armed forces of Germany from 1935 to 1945. It consisted of the Heer (army), the Kriegsmarine (navy) and the Luftwaffe (air force). The Waffen-SS, an initially small paramilitary section of Heinrich Himmler's Allgemeine SS that grew to nearly a million strong during World War II, was not officially part of the Wehrmacht, but subject to OKW, OKH, as well as Field Command. Thus, the Waffen-SS was, de facto, a fourth branch of the Wehrmacht. Although it is technically incorrect, the word Wehrmacht is often used to refer specifically to the German Army of the Second World War, as opposed to the Kriegsmarine and Luftwaffe. |
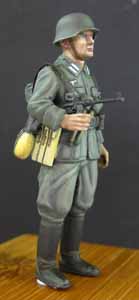
Origin and use of the termsBefore the rise of the NSDAP, the term Wehrmacht was used in a generic sense to describe armed forces of any nation, being utilized as the "home defense" version of the more general Streitmacht. For example, the term 'Britische Wehrmacht' would identify the British armed forces. Article 47 of the Weimar Constitution of 1919 declared "Der Reichspräsident hat den Oberbefehl über die gesamte Wehrmacht des Reiches" (meaning: "The Reichspräsident holds supreme command of all armed forces of the Reich"). To make a distinction, the term Reichswehr was commonly used to identify the German armed forces. Figure choiceThe figure that I chose to paint is the 1/35 Tamiya figure from the German Wehrmacht Mounted Infantry set You can always choose figures from DML or other brands which I can say are better sculpted than this older figure. Try to get the figures with upright poses if you are starting out since its easier to manipulate while painting. The painting was done using an imagined light source from the top of the figure(zenithal lighting) and that is how the everything else follows to that rule of thumb. Colors UsedField Grey, Green Grey, Black Grey, Offwhite, Flat White, Yellow Sand , Leather Brown, Orange Brown, Glossy Black Sea Grey, Brown Sand, Basic Skintone, Cadmium Burnt Red and Matt Black. All paints are from Vallejo Model Colour. Priming the modelI first primed the figure with a Tamiya light grey spray primer, and then undercoated the miniature figure with a Tamiya Matt black spray paint. Painting the fleshThe head and hands were painted first using Sand Brown and highlighted with Basic skintone and shaded with Burnt Cadmium Red. You can refer to the Painting a face in Oils or Painting Aragon pages regarding painting flesh colours. The uniformThe 3 basic colours of the uniform I used for the wehrmact(heer) uniform is Field Grey, Green Grey and Black Grey. The uniform were basecoated with German Field Grey and given 2-3 coats at a dilution ratio of 1 part paint and 2 part water. The next step was to apply the first highlight. A mix of 33% Green Grey were added to 66% Field Grey and applied to the general high points of the uniform. 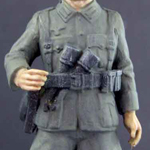 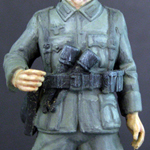 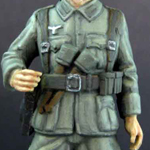 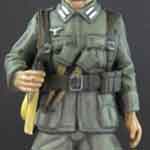
For the second highlight, 66% Grey Green were added to 33% Field Grey and applied on only prominent high areas of the uniforms like top of folds and creases. The last highlight was 100% Green Grey and applied on only the areas which catches the most light like the top of the collar and and folds of the uniform. Only 2 layers are applied for shade areas. The first layer consist of 50% black Grey and 50% Field Grey. This mix was applied into recesses and areas receiveing less light. The second shade is actually a black wash that is applied into only deep recesses and seams to create the contrast and accentuate the details of the miniature. AccessoriesThe webbing, belt and ammo pouches were basecoated with a mix of black and leather brown and highlighted with orange brown. The metal parts like the belt buckle and eagle insignia on the right chest were basecoated with Sea Grey and highlighted with Flat White. For the basecoat of the boots I used Matt Black and highlighted them with Orange Brown. The water bottle and magazine pouches are actually a mix of Khaki and Yellow Sand. Later, some burnt umber was added to that mix and used to weather and shade them. The helmet was painted using Field Grey and weathered using diluted basic skintone. It was then shaded using diluted black grey using stabbing motions with a brush. For the wooden handle of the grenade, and mix of Burnt Umber, Yellow Sand and Flat Earth was used to highlight the base coat of Leather Brown to simulate woodgrains. I used dark brown colours mixed with Glossy Black to paint the metallic parts of the weapon. Lastly, all the recesses were given a black wash one last time to give all the details more contrast. |
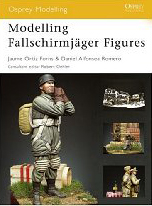 |
Recommended Books on WW2 German FiguresBasically when you talk about modelling German figures, there are 2 books from Osprey Publishing series that are well known in the modeling land. The first book is Modelling Fallschirmj�ger Figures |
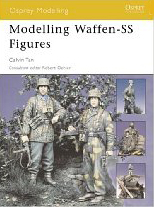 |
Whenever you go to a miniature modeling competition, you will definitely see the styles from either these two books being replicated by some contestants with German figures. These two books complement each other since both authors use Vallejo acrylics as their painting medium. Both authors from each book also utilises different techniques in painting and weathering. If you like to learn specifically about painting and modelling German figures, this is the first two books you should get. |