Converting and Sculpting Miniature Figures
|
|
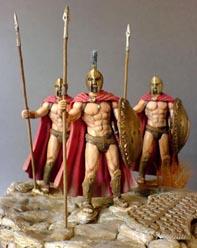
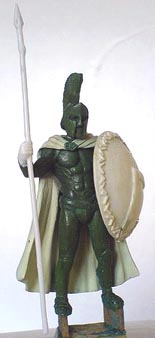
Though this website is about painting miniatures, I shall briefly share some ideas on figure conversion since it is an integral part of the world of miniatures today. Miniature figure conversion or modification comes about when you normally could not get any miniature figure that suits to your needs. You may want to change miniature figure to the pose that you want or the you want to create a totally new miniature out of an existing one. Some basic sculpting skill and tools are needed to do this. Figure conversion techniques may tentatively be classified as Beginner, Intermediate, and Advanced. Categorising these into classes is just to explain the difficulty level when it comes converting miniatures. |
Classification-beginner, intermediate and advancedThe Beginner category consists of basic conversion. A basic conversion is a figure change where the original figure remain unchanged except for accessories. Some Beginner conversion examples are equipment ‘conversions’ (changing the shape of a helmet, adding a ‘rim’ and/or ‘boss’ to a shield), “bend ‘n’ twist” repositioning, and equipment additions (belts, skirts, shields, weapons). The Intermediate category consists of conversions made using minor techniques. Minor conversion includes reposition of arms, hands, and heads, modifications to the upper body and conversions limited to modifications on the figure. The Advanced category consists of conversions that have major changes. Major conversions includes body and leg tweaking and original sculpting of body parts. |
|
Tools you need
When it comes to tools to sculpting miniatures figures, there are never the same between 2 different persons except between a master sculptor and his student. Tools may vary for different needs. Sculpting tools for a 28mm miniature figure may differ from a 54mm scale figure. It also depends on what material you are working on; Greenstuff, Milliput, Magic Sculp, Fimo or Tamiya putty.
There are various sculpting tools sold on the market and there some that you can make yourself. Some sculptors use dental instruments or they may even improvise and make their own. For myself, I sometimes use clay shapers and sometimes use an x-acto blade.
Having said that, I am still looking for better ways and techniques to improve and shall add more techniques here once I discover and tried them out.
Conversion Example
Painting and miniature figure conversions are simply the differing varieties that are part of this hobby. Most seasoned modellers will also tell you that conversion or modifying miniature figures are part of their modelling diet as well since it pushes the envelope of this hobby and make 'normal' things become more interesting.
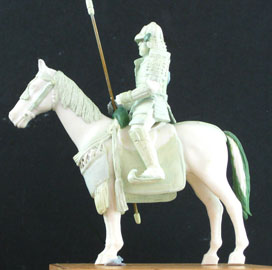
On this page, I shall discuss some ideas about figure conversions using my converted Tamiya figure as an example. To keep it simple, I shall discuss the conversions made on the helmet and horse.
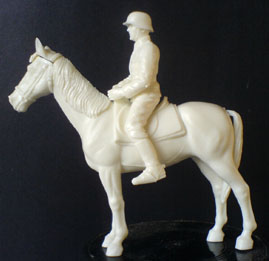
The miniature figure that I am working on is a Samurai cavalryman converted from a Tamiya German Wehrmacht Mounted Infantry set. The figure is an old Tamiya release and I thought of giving this model a new breath of life by creating a totally new model out of it. Below are some conversion ideas that I hope can help if you want to try figure conversions.
Making the Samurai HelmetConversion is a daunting aspect of modelling especially if you are new to it. Though I would like to encourage this aspect of the hobby, it was after many attempts that I finally completed my first figure. So never get discouraged if your first attempts are unsuccessful. |
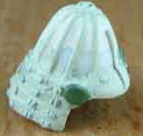 |
One interesting portion of the conversion was the Samurai helmet. With the original German helmet, I added a mix of greenstuff and fine miliput and made the conversion. The tricky part was to create the extended layered neck armour connected from the back of the helmet. I placed a ball of plastercine as a foundation inside the helmet and I shaped a thin piece of putty around the plastercine as a first step to create the neckpiece. |
I let that dry before adding more putty to finish and create the shape of the neck armour. Once the whole piece has harden and stuck onto the helmet, then I removed the plastercine ball and sand it smooth with a sandpaper before working on the details using fresh putty.
Maebashi (Visor)
Adding the visor was much simpler than the neck guard. Once I laid the foundation for the visorwith putty, I just built upon that and shaped the visor with a small x-acto knife .
Details
Adding tiny strings onto the helmet is very tricky and time consuming but that’s the only way to get a good detailed end result. When small details like these time and patience is the biggest factor.
Modifying the horse
Horsehair
The first step in the conversion was to modify the horse. I used ‘greenstuff’ or kneadnite putty to add more hair onto the tail since the original tail looked pretty flat. With a clay shaper, I textured the tail to give it some detail and merge with the original. Similarly, I also modified the mane since the original looked a bit odd and flat to me.
Saddle
I extended the saddle all the way below the tummy of the horse by adding rolled miliput. You need to add talcum powder to roll thin sheets of miliput and let it half dry about 30 minutes before putting it in position. Most of the details were added once the foundation have set in place and the putty dried.
Conclusion
I hope the basic examples are simple enough to understand and may help and motivate readers to attempt and create their own conversions. Its all about variety and make the same old things into something new and interesting. If you want to learn more about figure sculpting you can find out more from miniature sculpting books.
Bonus Tip
Below is link to an article I wrote for another site.
Making the World's Smallest Pipe


